

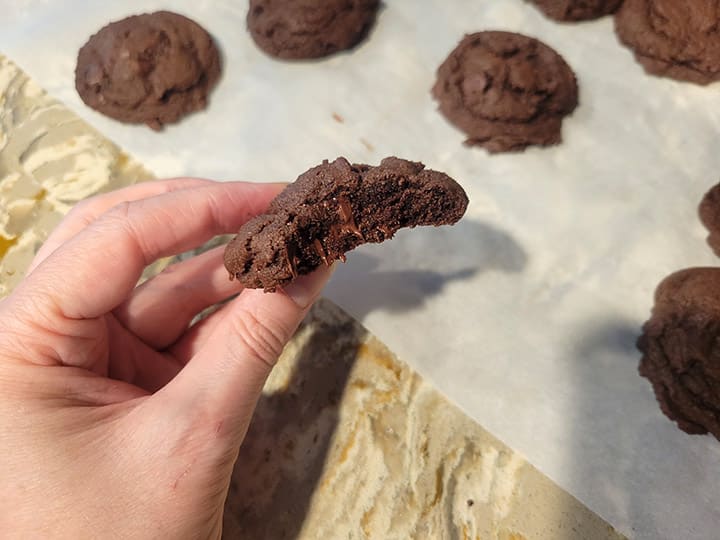
These cookies are so so good. Decadent, soft and chewy, crisp at the edges… they remind me of a very rich all-edge brownie. If you love chocolate and brownies and cookies this recipe is for you.
On to the how-to!
Start by gathering all of your ingredients and kitchen tools.
Kitchen tools you will need:
This recipe is easiest when you use a stand mixer, the dough becomes pretty dense by the end but if you have some decent hand/arm strength this one can be hand mixed too.
You will need:
- A mixing bowl
- Measuring tools
- A fork, stand mixer, or hand mixer
- A cookie scoop (looks like a smaller ice cream scoop) or large spoon
- A cookie sheet
Ingredients you will need:
- 1 cup butter at room temperature
- 2 cups granulated sugar
- 2 tsp pure vanilla extract
- 2 large eggs
- 2-1/4 cups all purpose flour
- 1 tsp baking soda
- ¾ cup unsweetened cocoa
- 1 tsp salt
- 2 cups semi-sweet chocolate chips
This recipe, like others than require room temperature butter, tend to irritate me as I almost always forget to leave the butter out to warm up. Creaming butter doesn’t work very well on hard cold butter or melted butter so try to remember to set your butter on the counter to come to room temperature well before you actually want to begin.
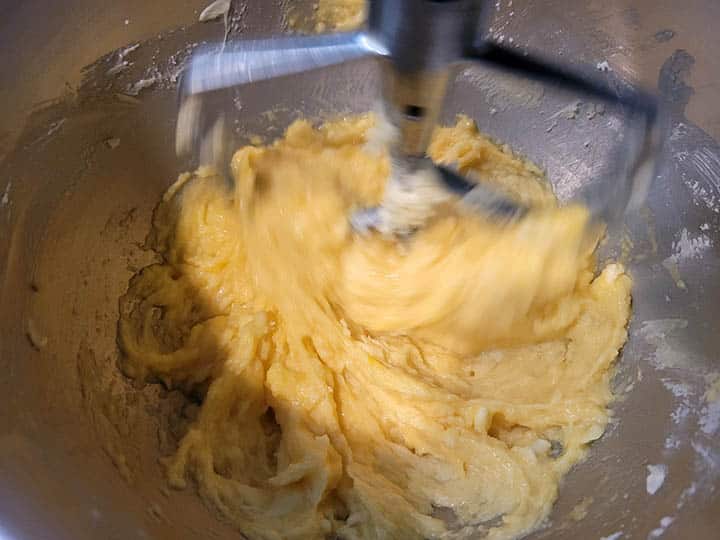
Once you have everything (and your butter is at room temperature), start by creaming the butter and sugar together.

Then add the eggs and vanilla. Make sure all is well mixed before adding the dry ingredients.
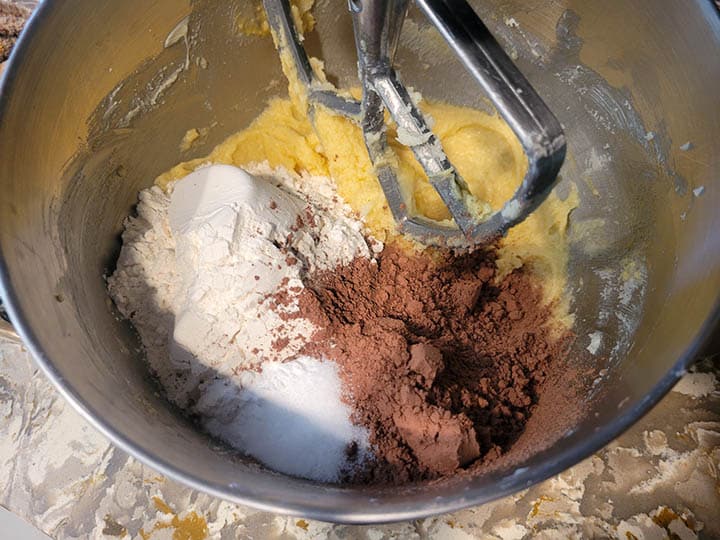
Once the wet is well mixed, add all of the dry – flour, baking soda, cocoa, and salt.
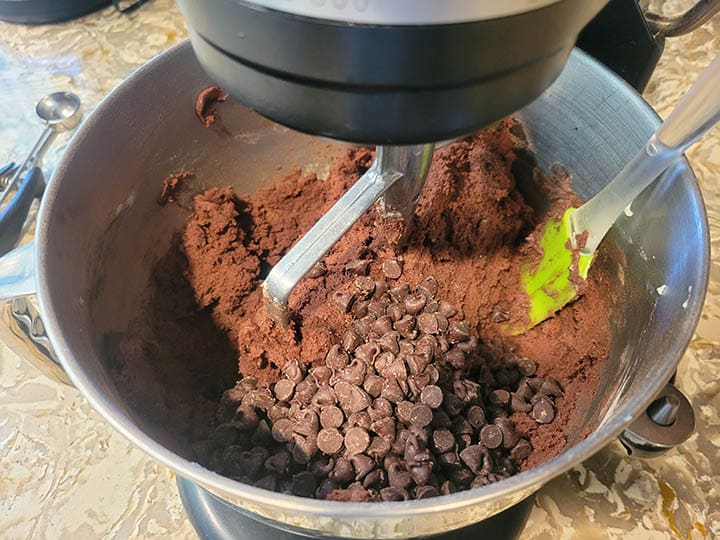
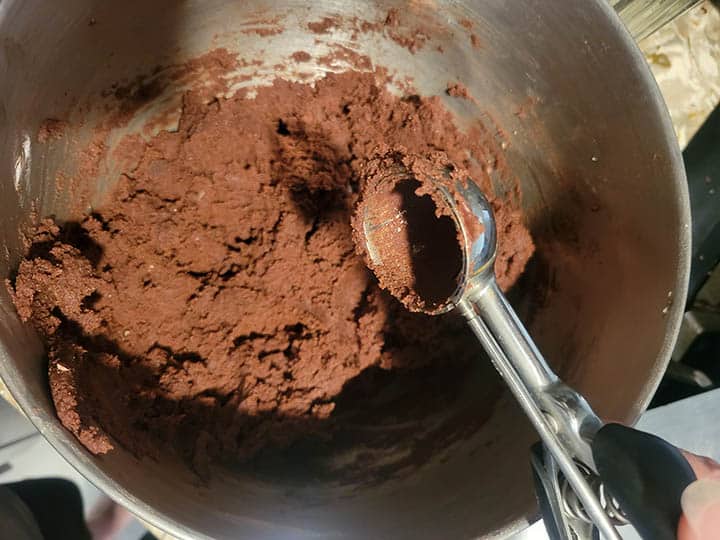
Mix these all in well. As you mix, the dough will form. It should hold together easily but stay dry enough for you to roll into a ball without sticking too much to your hands or utensils. The ready dough tends to remind me of playdough.
Last add the chocolate chips and mix those in.
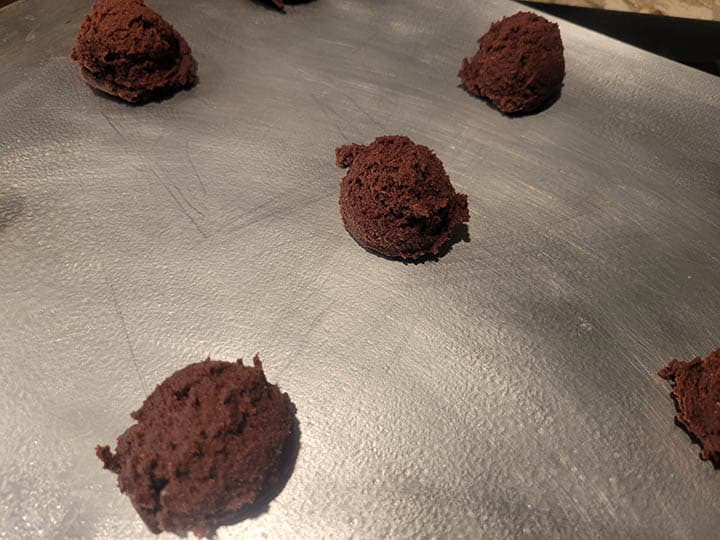
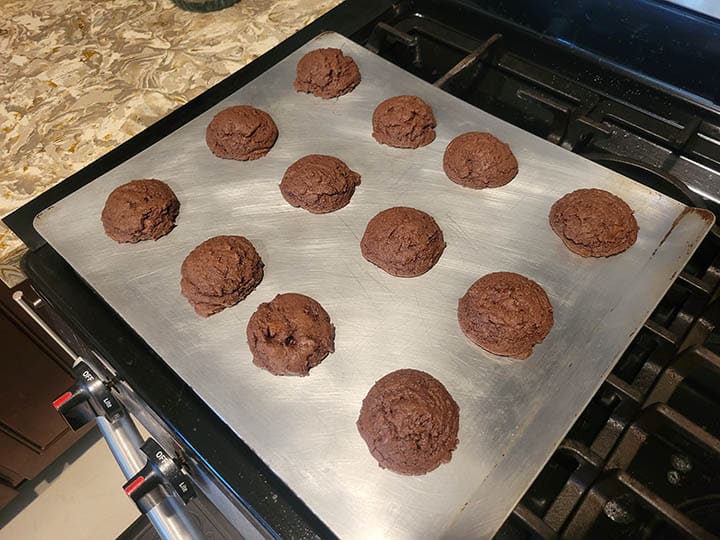
Once the dough is ready to bake, I like to use a cookie scoop to portion them out onto the cookie (cooking) sheet. This way all of them are uniform in shape and size. Of course they can be shaped by hand using a spoon (or two). Whatever method works best for you. Make the balls about an inch around and place on your prepared cookie sheet. Since these do not spread much you can fit 12 together on a sheet (3 rows of 4 cookies).

Pop the sheet in the preheated oven and set your timer. They should bake for around 9 minutes a batch. The cookie itself will not change color – they are already dark brown, so you need to watch them pretty closely and pull them out when the centers appear just set with a bit of gloss still in it.
At that point pull the cookies out and let them set for a minute or two before taking them off of the cookie sheet and transferring them to a cooling rack or sheet of parchment paper to cool down.
Once totally cooled down, PIG OUT! No, I mean store them in an air-tight container.
… and let us know what you think in the comments below!

Kim’s Double Chocolate Dream Cookies
Equipment
- A mixing bowl
- Measuring tools
- A fork, stand mixer, or hand mixer
- A cookie scoop (looks like a smaller ice cream scoop) or large spoon
- A cookie (or cooking) sheet
Ingredients
- 1 cup butter at room temperature
- 2 cups granulated sugar
- 2 tsp pure vanilla extract
- 2 large eggs
- 2-1/4 cups all purpose flour
- 1 tsp baking soda
- 3/4 cup unsweetened cocoa
- 1 tsp salt
- 2 cups semi-sweet chocolate chips
Instructions
- Preheat oven to 350F degrees.
- Either grease a cookie sheet or line it with parchment paper (whichever you prefer – I tend to just give the sheet a light spray with a cooking spray)
- With either a stand mixer or electric hand mixer – cream together the butter and sugar until smooth.
- Add the eggs and vanilla, beat until well combined.
- Add the flour, baking soda, cocoa, and salt and mix until the dough starts to form.
- Carefully stir in the chocolate chips.
- Using a small cookie scoop or spoon, roll the dough into cookie balls approximately 1” in diameter.
- Bake for 8-9 minutes until the center is just set – there should be a bit of gloss in the center when you pull them out. They will set as they cool.
Notes
Nutrition
CREDIT: Kim Ralph


